Macaron Birthday Cake

If you’re looking for a fun twist on a classic birthday dessert, check out this macaron birthday cake recipe! This dessert is composed of 5″ macaron shell layers and is filled with a playful rainbow sprinkle cake batter frosting. Mini cake batter macarons, cake batter frosting dollops, and festive birthday candles adorn the top for a finishing touch!

April is my birthday month so I thought it’d be fun to lean into a birthday theme for this next dessert on the blog. Macaron cakes are just so cute and I love the way they highlight the layers of filling and the macaron feet textures!
This post may contain affiliate links and I may earn a small commission when you click on the links at no additional cost to you.
Why You’ll Love this Macaron Birthday Cake
- Nostalgic cake batter flavor throughout the filling
- Cheerful and festive rainbow sprinkles
- Cute mini size cake
- Unique birthday dessert option
- Giftable for friends and family

Macaron Cake Supplies
Making macaron cakes takes essentially the same supplies as regular sized macarons! To view my favorite macaron baking products, check out my Macaron Baking Supplies List
Macaron Birthday Cake Ingredients
Rainbow Sprinkle Macaron Shells
- Egg Whites (Not boxed)
- Granulated Sugar
- Cream of Tartar (Stabilizes the meringue)
- Almond Flour (Finely Ground, I recommend Blue Diamond or Kirkland)
- Powdered Sugar
- Purple/Violet Gel Food Coloring: Optional for brighter white shells (Here’s the link to the one I used)
- Rainbow Non Pareil Sprinkles (Wilton Rainbow Non Pariel Sprinkles)

Cake Batter Frosting
- Salted Butter (If you use unsalted, add an additional 1/4 tsp per 4 oz stick of butter)
- Yellow Cake Mix (We’ll go over how to heat treat it so it’s not raw and unsafe to eat!)
- Cream Cheese (Make sure it’s the block style, not the tub. Blocks have less moisture)
- Powdered Sugar
- Vanilla Extract
- Almond Extract
- Pinch of Salt
Macaron Shell Templates
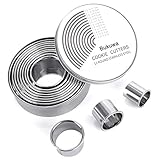
To create this template, all you’ll need is a 4″ round bowl or cookie cutter to trace 4 circles onto a piece of parchment paper. I’ve had a set of circle cookie cutters for a few years now and it comes in so handy for random stuff like this.
Although our circles are 4″, they’ll eventually spread out to be right around 5″ once the batter settles and we tap our trays.

Trace the four 4″ circles out on a piece of parchment or paper the size of your baking sheet. Leave as much space as you can between the circles and the edges. I made the mistake of making them too close one test round and the shells ended up merging together during the bake time. Boo.
This recipe makes enough batter for the four larger shells plus several minis to decorate the top! Make sure to have a regular size macaron template ready as well to pipe a few extras on a separate sheet.
Note: You wouldn’t want to bake the smaller shells on the same sheet as the large ones because they’ll need different times to bake. If you baked them together you run the risk of over baking the smaller shells and underbaking the larger shells.
Preparing the Rainbow Sprinkle Macaron Shells
First things first, if you’ve never made macarons before, I HIGHLY encourage you to read through my post Basic French Macarons to get the full run down on the process!
Begin preparing the macaron batter by setting out all of your equipment and ingredients so you’re ready to roll and not scrambling in any time sensitive parts of the process.
Combine the egg whites, granulated sugar, and cream of tartar to the bowl of an electric mixer. Whip up your meringue until it’s super stiff and glossy! Having a super stiff meringue ended up being the difference for me to get fuller shells in my macarons.

If you want to get slightly whiter shells, add in just a TINY dot of violet gel food coloring to cancel out some of the warm tones! When I say tiny, I mean TINY. I use a toothpick to add it. Add this during the last minute or so of whipping the meringue.
Folding the Dry Ingredients into the Meringue
Next, add in 1/2 of the sifted dry ingredients. Fold this until mostly incorporated, and then add in the remaining dry ingredients. Macaronage (fold the dry ingredients into the meringue) until the batter mostly settles back into itself when you do the Wiggle Test. Check with the wiggle test by scraping the batter down to the bottom of the bowl, wiggling the bowl back and forth several times, and then examining the batter. If the texture is mostly smooth but still has some subtle lines, it’s ready! See the photo below for reference.

Take note that my macaron recipe stays a bit thicker than most. It won’t look the same flowing off a spatula as a lot of typical macaron recipes do. Be careful not to overfold it.
Load the batter into a piping bag with a 2A piping tip. This 2A tip will be large enough to pipe the bigger shells, but small enough to also do the minis without having to switch tips.
Piping Large Macaron Shells for Macaron Cakes
Place the 4″ circle template onto an upside down baking sheet, and then place a silicone baking mat on top.

To pipe the macaron shells, hold the bag straight up and down with the tip hovering just above the center of the circles on the mat. Pipe with firm pressure directly in the center of the 4″ template. Continue piping allowing the batter to flow out on it’s own. For this size of shell, I just kept the piping tip in the center without piping around the edges or anything, but if you’re making larger shells for bigger macaron cakes you may need to pipe around the edge first and then fill in the center.
After piping the larger shells, tap the trays to remove air bubbles. Then, add on the rainbow sprinkles!

Once the larger shells are all piped, pipe several mini macarons onto a separate tray with a silicone mat. I had enough to pipe several smaller 1.25″ macarons, and 4-5 shells just shy of 1.5″

Resting and Baking the Macaron Shells
Next, rest the shells until they form a dry skin and are no longer tacky to the touch. Use a gentle fan to speed up the process, rotating the trays every few minutes for even drying! This step usually takes me about 16 minutes but will vary depending on your climate and humidity.
Bake the first tray with the large shells at 300 degrees for 20-25 minutes, or until they no longer wiggle when you press gently on the side of the shell just above the feet! Repeat with the tray of small macarons, baking for 16-20 minutes since they’re smaller.
To SKIP the resting process and speed up getting your shells in the oven, check out my post How to Oven Dry Macarons and Skip the Resting Process ! I almost exclusively oven dry my macarons at this point because it gets your first tray in the oven so much faster. I actually prefer the look of oven dried shells as well because the tops seem smoother and shinier!

Allow shells to fully cool before attempting to remove them from the mat. A general rule of thumb I recommend when removing shells is to move the MAT not the shell. Peel the mat away vs grabbing the shell and pulling it off.
Making the Cake Batter Frosting
Some cake batter frostings use cake mix to get their flavor, and some use a vanilla almond flavored cream cheese frosting! I decided to do a blend of the two to get the best of both worlds and it turned out GREAT!
Cake Batter Frosting Tips: Make sure the butter and cream cheese are both room temperature. If one is colder than the other you can run into clumps in your frosting! Also, make sure to scrape down the bowl as needed to make sure the ingredients are combining evenly.
Another important tip, if you’re using cake mix in a frosting or buttercream that you won’t be cooking, you can’t add it in raw. Cake mix contains flour, which needs to be baked to remove the risk of Ecoli. So let’s chat about heat treating!
How to Heat Treat Cake Mix
To heat treat cake mix, spread it in an even layer on a baking sheet. Bake at 350 degrees fahrenheit for 5 minutes or so until the mix reaches 160 degrees. Set the mix aside to cool.


Next, place the room temperature butter in the bowl of an electric mixer and beat on medium speed for about 1 minute. Then, add in the extracts, salt, and sift the cake mix in. Sifting removes the little crunchy pieces that are sometimes in box cake mix that don’t add anything to the flavor of the frosting. Beat until light and fluffy, about 2-3 minutes.
After that, slowly add in the powdered sugar and beat until light and fluffy again, about another 3-4 minutes. To finish the frosting, add in the room temperature cream cheese and mix until combined.
Mixing in the Rainbow Sprinkles
Next come the sprinkles! I recommend waiting until you’re ready to use the cake batter frosting to fold in the sprinkles. This is because the more you work in the sprinkles, the higher the chance the color will start to bleed off and tint the frosting. Some of my test runs ended up slightly pink because of this. If you make the frosting in advance, leave the sprinkles out until you’re ready to use it in case you need to rewhip it to get it back to the correct consistency. THEN fold in the sprinkles right before using.

Since this frosting has cream cheese in it, it may get a bit soft if left out in a warm kitchen. Pop it in the fridge if you need to firm it up!
Macaron Birthday Cake Assembly
Begin the macaron birthday cake assembly by spreading a small dollop of the cake batter frosting onto the serving plate or cake board you plan on using. Press one of the 5″ macaron shells flat side down onto the plate.
Tip: Obviously the goal is to get the four 5″ shells the exact same size, but if there’s a slight size variation, I recommend assembling the shells largest to smallest so the bottom shell is the bigger of the bunch.
Load the cake batter frosting into a piping bag fitted with a 4B piping tip or something similar.

Pipe dollops around the edges leaving about 3/4 inch of space, and then fill in the center with dollops as well.
Place the second shell flat side down on top of the dollops. Do NOT press down other than to make sure it’s even. By the time you repeat this step with the other shells, the lower shells will get pressed down each time, so don’t overdo it when you’re first placing them on.
I learned this the hard way! When I assembled this macaron cake the bottom shell ended up getting cracks and the filling on the first layer squished out more than the tops. Learn from my mistake!

Repeat this process of piping cake batter frosting dollops and placing on a shell until you’ve used all four shells.
Decorating the Macaron Birthday Cake
Next comes decorating the top of the macaron cake! Using the same cake batter frosting and piping tip, fill some of the smaller macarons. Make sure each shell is matched up with a shell of similar size, pipe a dollop of frosting on the flat side of one shell, and sandwich the other on top.
Decorate the top by piping more dollops of frosting and arranging the macarons to your liking. See photos for example!

An optional but festive and fun step to decorate, is to add birthday candles! Not going to lie I kind of wish I had gone for the rainbow candles instead of gold, but they both look cute.
Finally, sprinkle on a few more rainbow sprinkles to complete your macaron birthday cake. Light the candles and make a wish! I hope you enjoy this recipe and would be so honored if it made it’s way into your birthday celebrations.

If you make this macaron birthday cake recipe, I’d love to hear how it turns out! Feel free to leave a review, comment, or tag me on social media @the.white.whisk . Thanks for stopping by, here’s a slice shot for the road!

Looking for more macaron recipes? Check out these fan favorites!


Macaron Birthday Cake
Ingredients
Rainbow Sprinkle Macaron Shells
- 130 grams egg whites (Approximately 4 large eggs, always use scale to measure)
- 130 grams granulated sugar
- ½ tsp cream of tartar
- 200 grams almond flour (Preferably Blue Diamond)
- 200 grams confectioner’s sugar
- 1 tbsp rainbow nonpareil sprinkles
- 1 small dot violet gel food coloring (Optional: helps cancel out yellow tones for whiter shells)
Cake Batter Frosting
- 8 oz salted butter (room temperature)
- 5.2 oz yellow cake mix (1 cup) *needs to be heat treated, see recipe instructions
- 1 pinch salt
- 1 tsp almond extract
- 2 tsp vanilla extract
- 8.5 oz powdered sugar (2 cups)
- 8 oz cream cheese (room temperature, use the block style of cream cheese, not the tub)
- 2 tbsp rainbow nonpareil sprinkles
Assembly
- Birthday Candles
Instructions
Rainbow Sprinkle Macaron Shells
- *See notes for Oven Drying Process before beginning. This is what I primarily use currently, but this recipe will detail out a traditional rest method.
- On a piece of parchment the size of your baking sheet, create a template for the bigger shells. Trace four 4" circles, evenly spread out and not too close to each other or the edges of the pan. Tip: Use a 4" bowl or cookie cutter. *Note: Piping the shells as 4" circles will eventually give you 5" shells after the batter settles once the trays are tapped.
- Prepare the baking sheets by placing two baking sheets upside down. One tray should have the parchment template with a silicone mat on top. For the other tray, a silicone mat with smaller macaron circle templates is recommended.
- Place a medium sized round piping tip (like a Wilton 2A) in a large piping bag. Twist the bag right behind the tip and add a clip to seal off the opening. Place the bag tip down into either a clean tall cup with the edges folded over the rim to keep the bag open, or clip it into a bag holder.
- Using a kitchen scale, carefully weigh out and sift the confectioner’s sugar and almond flour into a medium mixing bowl. Whisk well to fully blend the two together.
- Place egg whites, granulated sugar, and cream of tartar into a large mixing bowl, and begin beating with a whisk attachment using either a handheld mixer or a stand mixer for 3 minutes on a medium low speed (Kitchen Aid Speed 4).
- Turn up the mixer to a medium speed (Kitchen Aid Speed 6) and beat for an additional 3 minutes.
- Add a TINY dot of purple gel food coloring to whiten shells (optional) Don't add too much color here or the shells will be too purple.
- Turn mixer up to medium high speed (Kitchen Aid Speed 8) and beat for 3 more minutes, or until peaks are very stiff and the meringue clumps up in a ball in the center of the whisk. Test stiffness by removing whisk and pointing it upward. (See photo in post) Once the peaks can hold their shape flipped upright, your meringue is ready.
- Pour half of your almond flour/confectioner’s sugar mixture into the bowl with your meringue, and fold 15 times. One fold is scraping all the way around the edge of your batter in your bowl, and then dragging your spatula through the middle. Be sure to scoop around the bottom of the bowl as well so you don’t miss any dry ingredients.
- Pour in the remaining powdered sugar and almond flour, and continue folding (approximately 30 more folds) until dry ingredients are fully incorporated and the batter is no longer super clumpy. Do not overfold. Please note this recipe stays a bit thicker than most, and should not be folded to the traditional figure 8 test consistency. Start checking your batter’s readiness every 5 folds or so at this point by scraping all batter down to the bottom of your bowl, and then wiggling your bowl back and forth several times. If the batter levels out with few subtle peaks and lines remaining, it should be ready. (See photos in post for reference.)
- Pour batter into prepared piping bag, and twist the opening off. Hold your bag at the twist between your thumb and pointer finger. Remove the clip.
- Holding the piping bag straight up and down, apply pressure to begin piping your batter in the center of your 4" circle templates, releasing pressure once you reach the edge of the template. Don't circle the piping tip around the template for this size of macaron, just let the batter flow out to the edges as you pipe. After you release pressure, use a small quick circular flick to release your tip from the piped macaron.
- Once you’ve piped all four larger shells, firmly bang the tray on the counter a few times to pop any air bubbles and smooth out shells. Pop any remaining large bubbles with a toothpick.
- Sprinkle on the rainbow nonpareils. Make sure some land on the sides where they will be seen after assembling the layers.
- With the second tray, pipe 4-5 1.5" sized macaron shells and several mini 1.25" shells. Tap trays and pop air bubbles again, and add rainbow sprinkles.
- Begin preheating your oven to 300 degrees, using an oven thermometer ensure accurate temperature readings.
- Set aside shells to dry until they form a skin and are no longer tacky to the touch. Once you can gently run a finger over your shells, they are ready to bake. Use a fan to speed up the process, rotating the tray every few minutes to ensure even drying. This usually takes at least 16-20 minutes for me even with a fan.
- Once shells are dry, and the oven has fully preheated to 300, place the first tray with the larger shells in the center of the middle rack of the oven. Bake for 18 minutes.
- Quickly open door to check the shell’s doneness by gently pressing on the side just above the feet to see if it’s firm. If it moves at all, rotate the tray and bake for another 2 minutes.
- Check shells by performing the same test, pressing on the side. If they are still unstable, bake for one more minute, and check again. Repeat until shells are firm and do not budge.
- Bake the second tray with the smaller macarons. They won't need as much bake time. Check shells after 16 minutes and repeat the check for doneness, baking in 1-2 minute increments until shells are firm when tested.
- Allow shells to cool completely, and then carefully remove from silicone mat or parchment paper by gently peeling them off.
Cake Batter Frosting
- Begin by heat treating the cake mix. Preheat oven to 350 degrees ℉. Spread the cake mix in an even layer on a baking sheet, and bake for 5 minutes until the mix reaches 160° making it safe to eat. Set aside until cool.
- In the bowl of an electric mixer, beat the butter on a medium high speed for one minute.
- Sift in the heat treated cake mix, and add in the salt, almond extract, and vanilla extract. Beat for 2-3 minutes on medium high. Scrape down the bowl as needed.
- Add in the powdered sugar, and beat until light and fluffy, about 3 more minutes.
- Add cream cheese, and beat until combined. Do not over mix at this point, cream cheese frosting can become runny if over mixed.
- When ready to use the frosting, fold in the rainbow sprinkles. Note: The more you mix the frosting once the sprinkles are in, the more the sprinkle color may bleed and change the tone of the overall buttercream. Wait to add in the sprinkles until you're about to use the frosting.
- Since this frosting contains cream cheese, it can get a bit soft if it's too warm. If the frosting feels too soft, chill it in the fridge to firm it up when needed.
Assembly
- Spread a small dollop of frosting onto your desired serving plate or cake board. Press one of the larger macaron shells flat side down onto the plate to secure it in place.
- Load the cake batter frosting into a piping bag fitted with a 4B piping tip or something similar. Pipe dollops around the edges leaving about 3/4 inch of space, and then fill in the center with dollops as well.
- Place the second shell flat side down on top of the dollops. Be super gentle when pressing the shell on the frosting making sure it's level. Do NOT press down hard or it may cause cracks and uneven filling squishing out on the bottom by the time you assemble all the layers.
- Repeat piping the dollops and placing the large shells on the cake until all four of the 5" shells have been layered on.
- Match up each of the smaller macaron shells with a partner of equal size. Pipe a dollop of frosting on one shell in each pair and sandwich the partner shell on top.
- Arrange the small macarons on the top of the cake with frosting dollops intermixed. See photos for reference.
- If desired, add on birthday candles and more rainbow sprinkles to finish it off.
- Refrigerate in an airtight container for 24 hours to allow the macarons to “mature” and fully develop their flavor and texture. Enjoy!
Notes
- Preheat oven to 275 F
- Prepare and pipe macaron batter.
- Place first tray of macarons directly into the oven, and prop the door open with a wooden spoon.
- Bake for 6-7 minutes with door propped open, or until macarons have begun to form feet.
- Close the oven door. If oven fluctuates up to 300 F on it’s own, don’t manually raise the temp. If oven does not fluctuate high enough, raise the temperature so it reaches 300F.
- Bake for 11-12 additional minutes, and then check to see if macarons are done baking by gently pressing the side of the shell. If it’s firm, it’s done. If it wiggles, rotate the tray and bake for an additional two minutes.
- Check shells for doneness, and if needed bake in 1 minute intervals until shells are finished baking and are no longer wiggly when pressed.

| New |
Learn how to whip up gorgeous macarons from your own kitchen with step-by-step lessons that simplify the entire process.
Learn More
The White Whisk
Online Macaron Course
How to split a batch and make ombré macarons, tower display options, and a few other tips and tricks.
How To Make An Ombré Macaron Tower

To rest macarons or not to rest? Or…Option C, the oven drying method!
How to Oven Dry Macarons and Skip the Resting Process

Ready to begin making macarons? Here's all the supplies you'll need.
Macaron Supply List: Everything You Need to Make Your Own Macarons

A detailed list of the current gear I use to capture photos and videos.
Must-Have Food Photography Gear: Cameras, Lenses, Backdrops, and More

Subscribe now to snag your freebie and stay up to date on the latest recipes and baking fun. Discover simple yet powerful tips that will have you creating bakery-worthy treats in no time.
7 Tips to Instantly Elevate Your Baking
Join My Email List for a free bonus
