Cake Batter Frosting

Playful, nostalgic, and absolutely delicious, this cake batter frosting is a great option to frost and fill macarons, cupcakes, cakes, and more! Classic vanilla and almond flavors shine in this recipe paired with bright rainbow sprinkles to bring all the birthday vibes!

I recently used this frosting to fill and decorate a macaron birthday cake, and it turned out so cute and scrumptious. Check out the recipe below!

Macaron Birthday Cake
This post may contain affiliate links and I may earn a small commission when you click on the links at no additional cost to you.

How to Give Frosting Cake Batter Flavor
Cake batter frosting usually tends to be flavored two ways.
Option 1: Flavor an American buttercream with heat treated cake mix and add rainbow sprinkles
Option 2: Flavor a cream cheese frosting with vanilla, almond, or even cake batter extracts, and add sprinkles.
I tried both options, and ended up feeling like neither quite got me the flavor I wanted. I eventually tried a blend of the two by flavoring a vanilla almond cream cheese frosting with heat treated cake mix, and it was a winner!
Here’s Why You’ll Love This Cake Batter Frosting
- Genuine cake batter flavor
- Easy to access ingredients
- Bright and playful rainbow sprinkles
- Quick to mix up
- Tangy from the cream cheese frosting base and not too sweet
Cake Batter Frosting Ingredients
- Salted butter (Room temperature, I love using salted butter for buttercreams because it balances out the sweetness)
- Box Yellow Cake Mix (We’ll go over heat treating this to make it safe to eat)
- Vanilla Extract
- Almond Extract
- Powdered Sugar
- Pinch of salt (once again, balances out the sweetness)
- Cream Cheese (Room Temperature)
- 2 tbsp Rainbow Nonpareil Sprinkles
How to Make Cake Batter Frosting
Some cake batter frostings use cake mix to get their flavor, and some use a vanilla almond flavored cream cheese frosting! This recipe uses a blend of the two to get the best of both worlds and it turns out delicious!

Importance of Butter and Cream Cheese Temperature
Make sure the butter and cream cheese are both very close to room temperature. If one is colder than the other you can run into clumps in your frosting! Also, make sure to scrape down the bowl as needed to make sure the ingredients are combining evenly.
How to Heat Treat Cake Mix
Another important tip, if you’re using cake mix in a frosting or buttercream that you won’t be cooking, it’s not safe to add it in raw. Cake mix contains flour, which needs to be baked or heat treated to remove the risk of Ecoli. So let’s chat about heat treating!
To heat treat cake mix, spread it in an even layer on a baking sheet. Bake at 350 degrees Fahrenheit for 5 minutes or so until the mix reaches 160 degrees. Set the mix aside to cool.
I used Betty Crocker Yellow Cake Mix for this recipe! If you use a different brand just make sure it’s yellow cake flavor.

Mixing the Ingredients
Next, you’ll need to place the room temperature butter in the bowl of an electric mixer and beat on medium speed for about 1 minute. Then, add in the extracts, salt, and sift the cake mix in. Sifting removes the little crunchy pieces that are sometimes in box cake mix that don’t add anything to the flavor of the frosting. Beat until light and fluffy, about 2-3 minutes.

Beating the butter and the cake mix together initially helps the cake mix dissolve a little bit so it is slightly less grainy in texture for the end result!
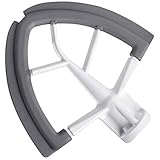
These kitchen aid paddle attachments with the scraper sides are handy for even mixing. Even so, make sure to scrape down the sides of the bowl with a silicone spatula as needed to ensure everything is getting mixed in well.
After that, slowly add in the powdered sugar with the mixer on a low speed. Once all of it has been added, beat on medium high until light and fluffy again, about another 3-4 minutes. To finish the frosting, add in the room temperature cream cheese and beat on medium low until well combined. Adding cream cheese in at the end instead of with the butter has shown to be helpful in avoiding the frosting becoming too soft.
Important Note: OVER mixing cream cheese based frostings can cause them to become runny. Don’t overdo it with mixing once the cream cheese has been added.
Mixing in the Rainbow Sprinkles
Next come the sprinkles! I recommend waiting until you’re ready to use the cake batter frosting to fold in the sprinkles. This is because the more you work in the sprinkles, the higher the chance the color will start to bleed off and tint the frosting. Some of my test runs ended up slightly pink because of this.


If you make the frosting in advance, leave the sprinkles out until you’re ready to use it in case you need to rewhip it after chilling to get it back to the correct consistency. THEN fold in the sprinkles right before using.

Since this frosting has cream cheese in it, it may get a bit soft if left out in a warm kitchen. Pop it in the fridge for a bit if you need to firm it up!
Frequently Asked Questions and Troubleshooting
If you find the frosting is turning a different color after mixing the sprinkles, the color may have started to bleed from over mixing. To avoid this, wait until you are ready to use the frosting before folding in the sprinkles if at all possible!
This frosting uses cream cheese in the recipe, which can be softer in general than a typical buttercream. The best way to avoid cream cheese based frostings becoming runny is to keep them from getting too warm (pop it in the fridge for a bit if your kitchen is warm!), and ensuring you mix in the cream cheese at the end of the mixing process. Also, don’t over mix it.
If you don’t mind the frosting being sweeter, you can also add in powdered sugar a few tablespoons at a time until you’ve reached the desired consistency. I personally prefer a less sweet frosting so I don’t typically use this option and stick with the chilling in the fridge option to firm it up.
If the butter or the cream cheese are at different temperatures or are too cold, this can cause lumps in the frosting that are difficult to blend together in the mixing process. Ensure butter and cream cheese are both at room temperature before beginning.
Yes! If you make the frosting in advance, leave the sprinkles out, and store the frosting in the fridge in an airtight container for up to two weeks, or in the freezer for up to 2-3 months. When you’re ready to use it, allow it to thaw in the fridge if frozen. After that, allow the frosting to sit at room temperature for a few minutes until soft enough to remix with a paddle attachment with an electric mixer to bring it back to a smooth consistency.
When ready to use the frosting, fold in the sprinkles and frost away!

What to Use Cake Batter Frosting With
There are plenty of dessert applications for this recipe! Here’s some ideas.
- Macarons
- Cakes
- Cupcakes
- Graham Cracker Dip
- Cookies
- Brownies
- Blondies

Looking for More Frostings and Fillings? Check These Out!


I hope you enjoy this recipe! If you try it out, I’d love to hear what you think. Feel free to leave a review, comment, or tag me on social media @the.white.whisk. Thanks for stopping by!


Cake Batter Frosting
Ingredients
- 8 oz salted butter (room temperature)
- 5.2 oz yellow cake mix (1 cup *needs to be heat treated, see recipe instructions)
- 1 pinch salt
- 1 tsp almond extract
- 2 tsp vanilla extract
- 8.5 oz powdered sugar (2 cups)
- 8 oz cream cheese (room temperature, use the block style of cream cheese, not the tub)
- 2 tbsp rainbow nonpareil sprinkles
Instructions
- Begin by heat treating the cake mix. Preheat oven to 350 degrees ℉. Spread the cake mix in an even layer on a baking sheet, and bake for 5 minutes until the mix reaches 160° making it safe to eat. Set aside until cool.
- In the bowl of an electric mixer, beat the butter on a medium high speed for one minute.
- Sift in the heat treated cake mix, and add the salt, almond extract, and vanilla extract, and beat for 2-3 minutes on medium high. Scrape down the bowl as needed.
- Add in the powdered sugar, and beat until light and fluffy, about 3 more minutes.
- Add cream cheese, and beat until combined. Do not over mix at this point, cream cheese frosting can become runny if heavily over mixed.
- When ready to use the frosting, fold in the rainbow sprinkles until just combined.Note: The more you mix the frosting once the sprinkles are in, the more the sprinkle color may bleed and change the tone of the overall buttercream. Wait to add in the sprinkles until you're about to use the frosting.
- Since this frosting contains cream cheese, it can get a bit soft if it's too warm. If the frosting feels too soft, chill it in the fridge to firm it up when needed. Enjoy!
Notes

| New |
Learn how to whip up gorgeous macarons from your own kitchen with step-by-step lessons that simplify the entire process.
Learn More
The White Whisk
Online Macaron Course
How to split a batch and make ombré macarons, tower display options, and a few other tips and tricks.
How To Make An Ombré Macaron Tower

To rest macarons or not to rest? Or…Option C, the oven drying method!
How to Oven Dry Macarons and Skip the Resting Process

Ready to begin making macarons? Here's all the supplies you'll need.
Macaron Supply List: Everything You Need to Make Your Own Macarons

A detailed list of the current gear I use to capture photos and videos.
Must-Have Food Photography Gear: Cameras, Lenses, Backdrops, and More

Subscribe now to snag your freebie and stay up to date on the latest recipes and baking fun. Discover simple yet powerful tips that will have you creating bakery-worthy treats in no time.
7 Tips to Instantly Elevate Your Baking
Join My Email List for a free bonus
