Spring Wreath Macaron Cake with Earl Grey Salted Caramel Filling

To make this gorgeous Spring Wreath Macaron Cake, follow along with this tutorial! This dessert is composed of two earl grey macaron layers, earl grey swiss meringue buttercream, salted caramel, and a stunning buttercream spring wreath design on top using palette knife and piping techniques.

I was asked to create a dessert for a fundraiser, and wanted to do something a bit more detailed than normal and have fun with it! Florals and greenery are always a huge inspiration around Spring time so a wreath inspired macaron cake felt like it would fit the bill well.
This post may contain affiliate links and I may earn a small commission when you click on the links at no additional cost to you.
Spring Wreath Macaron Cake Dessert Components
To make this spring wreath macaron cake, you’ll need the following components! The recipes will all be available at the end of this post.

- Earl grey macaron batter for large macaron shell layers
- Earl grey Swiss meringue buttercream for filling and decorating the wreath design
- Salted caramel for filling
Earl Grey Macaron Cake Layers
First, let’s talk about the macaron layers. I traced out a custom scalloped edge macaron template on two pieces of standard printer paper taped together. For the tracing, I used an 8.5″ plate, a 1.5″ wide cookie cutter to create the half circle scalloped edge, and a 2 3/8″ wide circle cookie cutter for the center. Because this template is easy to DIY in a few minutes, I decided to just show you how to make it vs creating a pdf product download. However, if you’re like MEGAN I want the download and want to skip the work, let me know and I’ll consider getting it up on my products page if there’s enough interest!

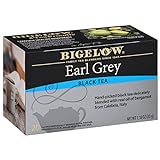
This recipe infuses Earl Grey Tea into the macaron batter by adding ground up earl grey tea into the dry ingredients. The Bigelow Earl Grey is always a trustworthy option.

These layers work out to be a right around 10″ wide!
Pipe the circles around the scalloped edge first, and then go back in piping the center border and then fill in the rest. You can see the rings of where I piped the batter in the photo below before I tapped the tray to work out air bubbles and smooth it out a bit.
Baking Large Macaron Cake Layers
Since the macaron layers are so large, they do take some extra time to bake in the oven. They also take extra time to cool down completely. Don’t be impatient to remove them from the mats before they’ve cooled, because larger macarons are much more prone to cracks and breaking!

Once they’re COMPLETELY cooled down, flip the macaron layers upside down by picking up the baking tray with the macaron and mat on it, and then picking up a second baking tray in your other hand. Quickly flip the tray with the macron onto the other tray, trying to support the macaron as much as possible with the second tray as you flip it, without smashing it.
Once it’s upside down, carefully peel off the silicone mat. Then, supporting the macaron layer with either another small tray or something flat, flip it back right side up.
Earl Grey Swiss Meringue Buttercream
This scrumptious swiss meringue buttercream gets it’s earl grey flavor by steeping the tea into the butter! Full directions can be found in the recipe at the end of the post, but essentially, you melt half of the butter on the stove and steep the tea in it.
After the flavor has been steeped in, run the melted butter through a fine mesh sieve to filter out the clumps of tea. Make sure to press down on the tea to squish out as much butter as possible. Allow the earl grey butter to come back to room temperature before mixing it in to the swiss meringue buttercream as usual.

If you’d like to learn more about Swiss Meringue Buttercream, check out my detailed post and recipe on Swiss Meringue Buttercream!
Salted Caramel Filling
When it comes to caramel, I’m a strong believer that homemade is worth the extra effort. If you have a favorite recipe already, that’s great! If not, I recommend Sally’s Baking Blog. Hers is the closest to what I’m currently using and tastes delicious.
For this cake you’ll need 1/3 cup, which works out to about 1/3 batch of Sally’s recipe. Make sure it’s cooled to room temp when you assemble the cake so it doesn’t melt the buttercream! Nobody wants a sad soupy mess melting all over the place.
Assembling the Spring Wreath Macaron Cake
Once all the components have cooled to room temperature, begin by loading 14 oz of the earl grey swiss meringue buttercream into a piping bag fitted with an 8B or 6B piping tip. Pipe a dollop of the buttercream around each of the scalloped edges, and then pipe a smaller one in between to seal an edge.


After that, pipe dollops around the center, and then pipe another ring around the middle creating a bit of a target design.

Next, fill in gaps with the salted caramel filling.

Then carefully transfer the second macaron shell to the top lined up as best as you can with the bottom scalloped edge.

Decorating the Spring Wreath Macaron Cake Design
Moving on to the spring wreath decoration! Here are the supplies you’ll need.

Spring Buttercream Wreath Decorating Supplies
- 17.5 oz Earl Grey Buttercream
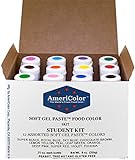
- Deep Green, Brown, and Navy Gel Food Coloring (I used Emerald, True Brown, and Navy Blue from The Sugar Art) I also frequently use Americolor which I’ll link below
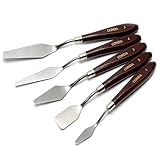
- Palette Knives
- White Non Pareils I used Sweet Tooth Fairy, below is a similar option on Amazon
- Piping Bags
- Piping Tips (3, 352, Medium Large Curved Rose Tip (125 can be a substitute), 18 or something similar)
- Flower Nail


Piped Buttercream Ranunculus and Rose Florals
To begin, load 8 oz of the earl grey buttercream into a piping bag fitted with a large curved rose tip. If you don’t have a curved one, a 125 would be a good substitute.

Cut out a dozen or so small squares of parchment paper. Pipe a tiny smear of buttercream onto a flower nail, and then stick a piece of parchment on the top.
With the piping tip edge vertically positioned, pipe a center of buttercream on the parchment square. Then, pipe three petals around the center.
After that, pipe two petals directly behind each of the first petals. Then, pipe a few more petals around the outside angled slightly more outward until the flower is about 2 inches wide.

Pipe 3 of the “fuller” flowers like this and place them on a tray or baking sheet still on the parchment.
Next, pipe 3 medium sized flowers a bit smaller than the full ones, following the same steps but not piping the last row of petals angled outward. Place these on the tray as well.
After that, pipe 3 small bud sized flowers only piping the first layer or two of petals, and then place those on the tray too.
Freeze the buttercream flowers until firm while working on the greenery of the wreath.
Palette Knife Leaves
Color 3 oz of the earl grey buttercream using 3 drops of the Deep Green food coloring and 2 drops of the brown. Then, spread a bit of the buttercream out on a cutting board.
Using a large palette knife, scrape the buttercream on the underside of the knife, scraping it back and forth across the cutting board at a 45 degree angle.

Gently press the buttercream loaded palette knife down onto the macaron layer, pulling towards the base of the leaf as you do so. Place the leaves organically around the outer and middle edges, and a few throughout the middle.
Piped Green Grass Leaves
Next, load color 4 oz of the earl grey buttercream with 2.5 drops of deep green food coloring and 1-2 drops of brown. Load it into a piping bag fitted with a 352 piping tip.

Pipe long grass stalks/leaves around the macaron wreath, ensuring some of them branch out towards the edges and center.

Arranging the Piped Buttercream Florals
Once frozen, peel the piped buttercream flowers from the parchment and arrange them on top of the leaves and grass on the wreath. Work quickly so the buttercream doesn’t soften and smudge when touched. See photos for placement suggestion.

Piped Blue Blossoms
Color 2.5 oz of the earl grey buttercream with 1/2-1 drop of navy blue food coloring. Load into a piping bag fitted with an 18 piping tip or something similar.

Pipe small drop flowers filling in the gaps and creating clusters of flowers. In some areas, continue layering more of the piped drop flowers to build up a taller cluster.
White Non Pareil Branches
Next, load the remaining deep green buttercream into a piping bag fitted with a #3 piping tip.
Pipe buttercream lines branching out from the wreath, and then cover them with white non pareils. If you need to, you can clean them up a bit by scooting the sprinkles back into place using tweezers or something similar.

Piped Buttercream Leaves
For a finishing touch, pipe a few buttercream leaves using the same medium green buttercream and 352 piping tip. You should be holding the bag so the “V” of the piping tip is on the sides. Apply quick bursts of pressure and then quickly pull away to create leaf shapes.

Pipe leaves around the roses, or to fill in any gaps.
Storing and Serving a Spring Wreath Macaron Cake
Whew! It’s all finished at this point! Let’s take a moment to chat about maturing, storing, and serving macaron cakes.
Maturing Macaron Cakes
Now that the macaron cake is assembled and decorated, store it in a box or on a covered cake stand in the fridge for 24 hours to mature and reach the ideal texture and flavor! If you don’t have a container that will fit the cake, place the decorated macaron in the cake to chill until the buttercream is firm. Then, carefully drape plastic wrap over the top of the cake and secure around and underneath the plate or cake board to wrap it.
Storing Macaron Cakes
Store the cake in the airtight container of your choosing in the fridge if you plan on eating it within the next few days! This particular cake will last up 3-4 days, but if you’re swapping out the filling and using something with more moisture like a pastry cream or cremeaux, you may only get 1-3 days of peak freshness.
If you plan on storing it longer than 3-4 days, I recommend freezing it instead! Macarons freeze beautifully as well as the earl grey swiss meringue buttercream and salted caramel filling. When thawing, I recommend placing it into the fridge 24 hours in advance, leaving it wrapped or boxed while the temperature comes up.
Serving Macaron Cakes
When ready to serve, take it out of the fridge at least 30 minutes in advance to allow the fillings to come to room temperature! Slice it just as you would with a regular cake, serve, and enjoy!

Tip: If you want super clean slices, slice it when it’s still a bit cold so the fillings squish a bit less.
More Spring Macaron Ideas


And that about wraps it up! I hope you enjoy this tutorial and recipe! If you give it a go I’d love to hear your thoughts. Feel free to tag me on Instagram @the.white.whisk or drop a review/comment here on the blog.

Spring Wreath Macaron Cake With Earl Grey Salted Caramel Filling
Ingredients
Earl Grey Macaron Shells
- 162 grams egg whites (Approximately 5-6 Large Eggs, Use Scale)
- 150 grams granulated sugar
- heaping ½ tsp cream of tartar
- 245 grams almond flour
- 245 grams confectioner’s sugar
- 8 grams of Earl Grey Tea (about 5-6 individual tea bags, use scale)
- 2 drops deep green gel food coloring (like Emerald from The Sugar Art)
- 2 drops brown gel food coloring (like True Brown from The Sugar Art)
Earl Grey Swiss Meringue Buttercream
- 130 grams egg whites (4 oz, about 5 egg whites, use a scale)
- 265 grams granulated sugar
- 270 grams salted butter (about 5.5 oz butter)
- 270 grams unsalted butter (about 5.5 oz butter)
- 26 grams Earl Grey Tea (about 18-19 standard bags)
Assembly
- ⅓ cup homemade salted caramel (see notes for recipe recommendations)
Wreath Decoration
- deep green gel food coloring (I used Emerald from The Sugar Art)
- brown gel food coloring (True Brown The Sugar Art)
- navy blue gel food coloring (Navy The Sugar Art)
- ½ tbsp white non pareil sprinkles
Instructions
Earl Grey Tea Macaron Shells
- *See notes for Oven Drying Process before beginning. This is what I primarily use currently, but this recipe will detail out a traditional rest method.
- Line 2 upside down baking sheets with a silicone mat. Place the scalloped circle template (instructions on how to make it in post) underneath the first silicone mat.
- Place a medium/large round piping tip like a 2A in a large piping bag. Twist the bag right behind the tip and add a clip to seal off the opening. Place the bag tip down into either a clean tall cup with the edges folded over the rim to keep the bag open, or clip it into a bag holder.
- Pulse the Earl Grey tea in a food processor until it becomes less coarse.
- Using a kitchen scale, carefully weigh out and sift the confectioner’s sugar, Earl Grey Tea, and almond flour into a medium mixing bowl. Whisk well to fully blend the three together.
- Place egg whites, sugar, and cream of tartar into a large mixing bowl, and begin beating with a whisk attachment using either a handheld mixer or a stand mixer for 3 minutes on a medium low speed (Kitchen Aid Speed 4).
- Turn up the mixer to a medium speed (Kitchen Aid Speed 6) and beat for an additional 3 minutes.
- Add the green and brown gel food coloring.
- Turn mixer up to medium high speed (Kitchen Aid Speed 8) and beat for 3 more minutes, or until peaks are very stiff and the meringue clumps up in a ball in the center of the whisk. Test stiffness by removing whisk and pointing it upward. (See photo in Basic French Macarons post for reference) Once the peaks can hold their shape flipped upright, your meringue is ready.
- Pour half of your almond flour/tea/confectioner’s sugar mixture into the bowl with your meringue, and fold 15 times. One fold is scraping all the way around the edge of your batter in your bowl, and then dragging your spatula through the middle to knock out air. Be sure to scoop around the bottom of the bowl as well so you don’t miss any dry ingredients.
- Pour in the remaining powdered sugar, tea, and almond flour, and continue folding (approximately 30 more folds) until dry ingredients are fully incorporated. Do not overfold. Start checking your batter’s readiness every 5 folds or so at this point by scraping all batter down to the bottom of your bowl, and then wiggling your bowl back and forth several times. If the batter levels out with very few peaks and lines remaining, it should be ready. (Take note that some shell recipes with flavor add ins can have a bit thicker of a consistency)
- Pour batter into prepared piping bag, and twist the opening off. Hold your bag at the twist between your thumb and pointer finger. Remove the clip near the piping tip.
- Holding the piping bag straight up and down, apply pressure to begin piping your batter in the center of each scalloped half circle around the edges of the template, releasing pressure once you are a few millimeters short of the outline. After you release pressure, use a small quick circular flick to release your tip from the piped batter.
- Pipe a ring of batter around the inner border of the macaron cake layer, leaving once again a few millimeters of space to the edge. Then, pipe the batter in rings to fill in between the scalloped edge and the center ring.
- Once you’ve piped the first macaron, firmly bang the tray on the counter a few times to pop any air bubbles and smooth out shells. Pop any remaining large bubbles with a toothpick or scribe tool. Repeat with the second tray and macaron layer.
- Begin preheating your oven to 300 degrees, using an oven thermometer to ensure accurate temperature readings.
- Set aside the macaron shells to dry until they form a skin and are no longer tacky to the touch. Once you can gently run a finger over your shells, they are ready to bake. Use a fan to speed up the process, rotating the tray every few minutes to ensure even drying. This usually takes 16-20 minutes for me with a fan. (Rest for a shorter amount of time if you deal with high humidity issues)
- Once the shells are dry and the oven has fully preheated to 300, place one tray in the center of the middle rack of the oven. Bake for 20 minutes.
- Quickly open door to check the shell’s doneness by gently pressing on the side just above the feet to see if it’s firm. If it moves at all, bake for another 2 minutes.
- Check shells by performing the same test, pressing on the side. If they are still unstable, bake for one more minute, and check again. Repeat until shells are firm and do not budge, then remove from oven. Make sure oven is still at the correct temperature and then bake your second tray.
- Allow shells to cool completely, and the carefully remove from silicone mat by carefully flipping them upside down over on to another tray or flat surface, and gently peeling the mat off. Support the macaron during the flip as much as possible holding the trays on each side without squishing them.
Earl Grey Swiss Meringue Buttercream
- Melt the unsalted butter and all the tea together in a small sauce pot and bring to a boil. Once boiling, simmer on lowest heat setting for 5 minutes, stirring semi frequently to avoid burning.
- Remove from heat and steep for another 5 minutes.
- Strain butter and tea through a fine mesh sieve into a shallow container, making sure to press the tea against the mesh to squish all of the butter out. Set aside to cool to room temperature. Speed up the process by chilling in the fridge.
- Using a medium size sauce pot, bring an inch or so of water to a boil.
- In a medium heat safe metal or glass bowl that is large enough to rest on top of the sauce pot, whisk together the egg whites and sugar. (Use a stainless steel kitchen aid mixing bowl and whisk attachment to save a dish later.)
- Place bowl on top of the pot with boiling water and continue whisking occasionally until the sugar has dissolved and the mixture reaches 160 degrees Fahrenheit. Check by rubbing a small amount of egg mixture between fingers to check for graininess. Keep cooking and whisking until mixture feels smooth and no grittiness remains.
- Remove bowl from heat, and use an electric mixer to whisk the mixture until a stiff glossy meringue forms.
- Once the meringue cools down a bit, add in the Earl Grey butter and the salted butter.
- Beat for another few minutes until the buttercream is light and fluffy, and the butter flavor becomes less prominent.
Assembly
- Spread a very thin smear of buttercream onto your serving plate or cake board. Place one of the macaron layers onto it flat side down.
- Load 15 oz of the earl grey swiss meringue buttercream into a piping bag fitted with an 8B or 6B piping tip. Pipe a dollop of the buttercream in the center of each of the scalloped edges, and then pipe a smaller one in between to seal an edge.
- Pipe more dollops around the center close enough to touch and form a border, and then pipe another ring in middle creating a bit of a target design. See photos for reference.
- Fill in gaps by drizzling, spooning, or piping in the salted caramel.
- Gently line up and sandwich the second macaron shell on top.
Piped Rose/Ranunculus Flowers
- To begin, load 8 oz of the earl grey buttercream into a piping bag fitted with a large curved rose tip. If you don't have a curved one, a 125 would be a good substitute.
- Cut out a dozen or so small squares of parchment paper. Pipe a tiny smear of buttercream onto a flower nail, and then stick a piece of parchment on the top.
- With the piping tip edge vertically positioned, pipe a center of buttercream on the parchment square. Then, pipe three petals around the center by piping in an arch motion while slightly spinning the flower nail.
- Pipe two petals directly behind each of the first petals. Then, pipe a few more petals around the outside angled slightly more outward until the flower is about 2 inches wide. NOTE: For more of a ranunculus type look, pipe a few petals directly behind each other before moving to the next layer. For roses, each petal is more evenly distributed within each layer.
- Pipe 3 of the "fuller" flowers like this and place them on a tray or baking sheet still on the parchment.
- Next, pipe 3 medium sized flowers a bit smaller than the full ones, following the same steps but not piping the last row of petals angled outward. Place these on the tray as well.
- After that, pipe 3 small bud sized flowers only piping the first layer or two of petals, and then place those on the tray too.
- Freeze the buttercream flowers until firm while working on the greenery of the wreath.
Palette Knife Leaves
- Color 3 oz of the earl grey buttercream using 3 drops of the Deep Green food coloring and 2 drops of the brown. Then, spread a bit of the buttercream out on a cutting board.
- Using a large palette knife, scrape the buttercream on the underside of the knife, scraping it back and forth across the cutting board at a 45 degree angle.
- Gently press the buttercream loaded palette knife down onto the macaron layer, pulling towards the base of the leaf as you do so. Place the leaves organically around the outer and middle edges, and a few throughout the middle.
Piped Grass Leaves
- Next, color 4 oz of the earl grey buttercream with 2.5 drops of deep green food coloring and 1-2 drops of brown. It will get darker as it sits. Load it into a piping bag fitted with a 352 piping tip.
- Pipe long grass stalks/leaves around the macaron wreath, ensuring some of them branch out towards the edges and center.
Arranging the Frozen Piped Buttercream Florals
- Once frozen, peel the piped buttercream flowers from the parchment and arrange them on top of the leaves and grass on the wreath. Work quickly so the buttercream doesn't soften and smudge when touched. See photos for placement suggestion.
Piped Blue Blossoms
- Color 2.5 oz of the earl grey buttercream with 1/2-1 drop of navy blue food coloring. Load into a piping bag fitted with an 18 piping tip or something similar.
- Pipe small drop flowers filling in the gaps and creating clusters of flowers. In some areas, continue layering more of the piped drop flowers to build up a taller cluster.
White Non Pariel Branches
- Load the remaining deep green buttercream into a piping bag fitted with a #3 piping tip.
- Pipe buttercream lines branching out from the wreath, and then cover them with white non pariels. If you need to, you can clean them up a bit by scooting the sprinkles back into place using tweezers or something similar.
Piped Buttercream Leaves
- Pipe a few buttercream leaves using the medium green buttercream again with the same 352 piping tip. You should be holding the bag so the "V" of the piping tip is on the sides. Apply quick bursts of pressure and then quickly pull away to create leaf shapes.
- Pipe leaves around the roses, or to fill in any gaps.
Maturing and Serving
- Refrigerate in an airtight container (or chill until buttercream is firm, carefully wrap with plastic wrap, and store in fridge) for 24 hours to allow the macaron cake to “mature” and fully develop ideal flavor and texture. Eat within 3-4 days. Enjoy!
Notes
- Preheat oven to 275 F
- Prepare and pipe macaron batter.
- Place first tray of macarons directly into the oven, and prop the door open with a wooden spoon.
- Bake for 6-7 minutes with door propped open, or until macarons have begun to form feet.
- Close the oven door. If oven fluctuates up to 300 F on it’s own, don’t manually raise the temp. If oven does not fluctuate high enough, raise the temperature so it reaches 300F.
- Bake for 11-12 additional minutes, and then check to see if macarons are done baking by gently pressing the side of the shell. If it’s firm, it’s done. If it wiggles, rotate the tray and bake for an additional two minutes.
- Check shells for doneness, and if needed bake in 1 minute intervals until shells are finished baking and are no longer wiggly when pressed.
Leave a Reply

| New |
Learn how to whip up gorgeous macarons from your own kitchen with step-by-step lessons that simplify the entire process.
Learn More
The White Whisk
Online Macaron Course
How to split a batch and make ombré macarons, tower display options, and a few other tips and tricks.
How To Make An Ombré Macaron Tower

To rest macarons or not to rest? Or…Option C, the oven drying method!
How to Oven Dry Macarons and Skip the Resting Process

Ready to begin making macarons? Here's all the supplies you'll need.
Macaron Supply List: Everything You Need to Make Your Own Macarons

A detailed list of the current gear I use to capture photos and videos.
Must-Have Food Photography Gear: Cameras, Lenses, Backdrops, and More

Subscribe now to snag your freebie and stay up to date on the latest recipes and baking fun. Discover simple yet powerful tips that will have you creating bakery-worthy treats in no time.
7 Tips to Instantly Elevate Your Baking
Join My Email List for a free bonus

This was time well spent.
Thank you for the kind words!
How long will this keep in an airtight cellophane bag or airtight container? Thanks so much!
Hi Jami! This dessert would last well in an airtight container in the fridge for 3-5 days. Best eaten after 24 hours of maturing! 😊 I do recommend storing it in a box though vs cellophane if you want to do the Swiss meringue buttercream decoration on top. For a sturdy option you could bag, you could swap it for royal icing!