Blackberry Mint Macarons

Summer time is here and so is the fresh produce that comes with it! The macaron recipe I’d like to share with you today features peak season blackberry filling, along with a crisp mint and blackberry buttercream.
Berries are hands down my favorite type of fruit. When summer time rolls around here in the PNW, you can guarantee you’ll find me somewhere out in the sticks with a giant bowl picking wild blackberries.

The blackberries I used for this recipe weren’t hand picked by me, but trust me, they were still delicious!
To begin, you’ll need to make your shells. If you’re new to making macarons or would like a refresher on the process, head over to my Basic French Macarons recipe!
This post may contain affiliate links and I may earn a small commission when you click on the links at no additional cost to you.
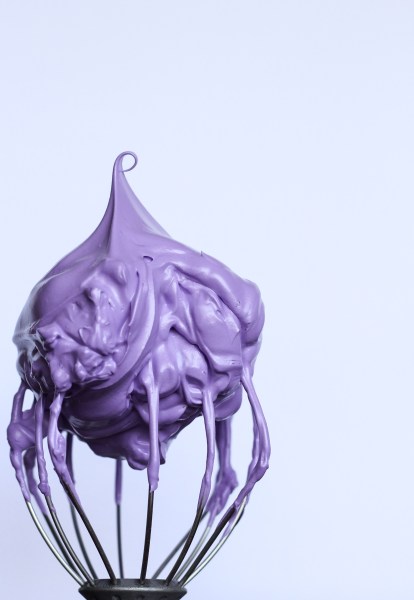
This purple shade was created with 18 drops of Americolor Violet, 3 drops of Americolor Deep Pink, 1 drop of Americolor Royal Blue, and 1 drop of Americolor black. I’ll place a link to the food coloring set I use below!
I under macaronaged these shells just a pinch as you can probably see by the bumpier than usual texture, but they were still totally fine to use. Under macaronage is always better than over macaronage!

Next up, you’ll want to make your blackberry filling so it has time to cool! Just a heads up, I prefer to make my fruit fillings thicker than usual when I’m using them for macarons. In my experience, the runnier the fruit filling, the faster it will make your shells soggy.
The blackberry mint buttercream is pretty straightforward to make. Whip that butter like there’s no tomorrow, add your powdered sugar and mint extract and whip again, and then finally add in some of your (cooled) blackberry filling!


Once your shells have cooled, pair each shell up with a buddy shell that is the same size. Lay out one shell from each pair and create a splatter effect on them using thinned violet food coloring and a paint brush.

When doing a splatter, try to add enough clear extract (like mint or imitation vanilla) to the food coloring to make sure it flicks off of your brush instead of clumping off. See video for reference!
You can also save this step and do it after you’ve assembled your macarons if you don’t want to keep track of which shell went with which.

To assemble, pipe a ring of the mint blackberry buttercream on one shell in each pair, and then fill with the blackberry filling.

Store macarons in an airtight container in the fridge for 24 hours before eating to allow them to reach the ideal texture and flavor.

Enjoy! Thanks for stopping by!


Blackberry Mint Macarons
Ingredients
Macaron Shells
- 130 grams egg whites
- 120 grams granulated sugar
- ½ tsp cream of tartar
- 200 grams almond flour
- 200 grams confectioner’s sugar
- 18 drops Americolor Violet Gel Food Coloring
- 3 drops Americolor Deep Pink Gel Food Coloring
- 1 drop Americolor Royal Blue Gel Food Coloring
- 1 drop Americolor Black Gel Food Coloring
Blackberry Filling
- 1 ¼ cup blackberries
- 5 tbsp granulated sugar
- 1 tbsp lemon juice
- 3 tbsp water
- 2 tbsp cornstarch
Mint Blackberry Buttercream
- 4 oz salted butter
- 9 oz confectioner’s sugar
- ¼ plus ⅛ tsp mint extract
- 1 pinch salt
- 3 tbsp blackberry filling (fully cooled, from included recipe)
- 1 drop Americolor Violet Gel Food Coloring
Assembly
- 2 drops Americolor Violet Gel Food Coloring
- Clear extract (mint or imitation vanilla) or vodka
Instructions
Macaron Shells
- Line 2 baking sheets with either parchment paper or a silicone mat (circle template optional but recommended).
- Place a medium sized round piping tip (ex: Wilton 12 or 2A) in a large piping bag. Twist the bag right behind the tip and add a clip to seal off the opening. Place the bag tip down into either a clean tall cup with the edges folded over the rim to keep the bag open, or clip it into a bag holder.
- Using a kitchen scale, carefully weigh out and sift the confectioner’s sugar and almond flour into a medium mixing bowl. Whisk well to fully blend the two together.
- Place egg whites, granulated sugar, and cream of tartar into a large mixing bowl, and begin beating with a whisk attachment using either a handheld mixer or a stand mixer for 2 minutes on a medium low speed (Kitchen Aid Speed 4).
- Turn up the mixer to a medium speed (Kitchen Aid Speed 6) and beat for an additional 2 minutes.
- Turn mixer up to medium high speed (Kitchen Aid Speed 8) and beat for 3 more minutes, or until peaks are very stiff and the meringue clumps up in a ball in the center of the whisk. Test stiffness by removing whisk and pointing it upward. Once the peaks can firmly hold their shape flipped upright, your meringue is ready.
- Pour half of your almond flour/confectioner’s sugar mixture into the bowl with your meringue, and fold 15 times. One fold is scraping all the way around the edge of your batter in your bowl, and then dragging your spatula through the middle. Be sure to scoop around the bottom of the bowl as well so you don’t miss any dry ingredients.
- Pour in the remaining powdered sugar and almond flour, and continue folding (approximately 30 more folds) until dry ingredients are fully incorporated, your batter is no longer clumpy and stiff. Do not overfold. Start checking your batter’s readiness every 5 folds or so at this point by scraping all batter down to the bottom of your bowl, and then wiggling your bowl back and forth several times. If the batter levels out with very few peaks and lines remaining, it should be ready. (See photos in Basic French Macarons post for reference)
- Pour batter into prepared piping bag, and twist the opening off. Hold your bag at the twist between your thumb and pointer finger. Remove the clip.
- Holding the piping bag straight up and down, apply pressure to begin piping your batter in the center of your circle templates, releasing pressure once you are a few millimeters short of your desired size. After you release pressure, use a small quick circular flick to release your tip from the piped macaron.
- Once you’ve piped a full tray, firmly bang the tray on the counter a few times to pop any air bubbles and smooth out shells. Pop any remaining large bubbles with a toothpick or scribe tool. Repeat with the second tray.
- Begin preheating your oven to 295 degrees, using an oven thermometer if possible to ensure accurate temperature readings.
- Set aside shells to dry until they form a skin and are no longer tacky to the touch. Once you can gently run a finger over your shells, they are ready to bake. Use a fan to speed up the process, rotating the tray every few minutes to ensure even drying. This usually takes at least 20 minutes for me even with a fan.
- Once shells are dry, and the oven has fully preheated to 295, place one tray in the center of the middle rack of the oven. Bake for 18 minutes.
- Quickly open door to check the shell’s doneness by gently pressing on the side just above the feet to see if it’s firm. If it moves at all, bake for another 2 minutes.
- Check shells by performing the same test, pressing on the side. If they are still unstable, bake for one more minute, and check again. Repeat until shells are firm and do not budge.
- Allow shells to cool completely, and the carefully remove from silicone mat or parchment paper by gently peeling them off.
Blackberry Filling
- Stir blackberries and sugar together in a small saucepan over medium heat until the berries begin breaking down. Mash them with a wooden spatula as you go.
- In a separate bowl, whisk together water, lemon juice, and cornstarch until well combined, and then add them to the saucepan while stirring the blackberry mixture.
- Continue cooking until mixture is bubbling and has thickened.
- Remove from heat and allow to cool completely before use.
Mint Blackberry Buttercream
- Place butter in a mixing bowl, and beat until light and fluffy.
- Add powdered sugar, salt, and mint extract and beat until frosting starts to come together. Mix for 2 minutes, and then scrape down the bowl and beater. Mix for an additional 2 minutes.
- Once the blackberry filling has cooled, add 3 tablespoons of it into the buttercream along with 1 drop of violet gel food coloring and beat until fully combined.
Assembly
- Match each shell with a partner shell of equal size.
- Using a size 12 Wilton tip and the mint blackberry buttercream, pipe a ring on to one shell, leaving at least 1/4 inch of space around the edge. See photos in post for reference.
- Place cooled blackberry filling in a piping bag (or ziploc bag with the corner cut off) and fill the middle of the buttercream ring.
- Gently sandwich the partner shell on top and carefully squish down until the filling is close to the edge of the shell.
- Line up assembled macarons on a large piece of parchment paper. This next part gets messy so make sure you don't have anything that will stain laying near your work space.
- Thin a drop or two of Americolor Violet food coloring with clear extract (like mint, clear vanilla, or even vodka) to a runny consistency.
- Using a clean food safe paintbrush, dip into the thinned food coloring. Flick the color onto your macarons by either tapping the handle on your finger, flicking the bristles on a knife, or even just using a gloved finger. Allow to dry.
- Refrigerate in an airtight container for 24 hours to allow the macarons to “mature” and fully develop their flavor and texture. Enjoy!

| New |
Learn how to whip up gorgeous macarons from your own kitchen with step-by-step lessons that simplify the entire process.
Learn More
The White Whisk
Online Macaron Course
How to split a batch and make ombré macarons, tower display options, and a few other tips and tricks.
How To Make An Ombré Macaron Tower

To rest macarons or not to rest? Or…Option C, the oven drying method!
How to Oven Dry Macarons and Skip the Resting Process

Ready to begin making macarons? Here's all the supplies you'll need.
Macaron Supply List: Everything You Need to Make Your Own Macarons

A detailed list of the current gear I use to capture photos and videos.
Must-Have Food Photography Gear: Cameras, Lenses, Backdrops, and More

Subscribe now to snag your freebie and stay up to date on the latest recipes and baking fun. Discover simple yet powerful tips that will have you creating bakery-worthy treats in no time.
7 Tips to Instantly Elevate Your Baking
Join My Email List for a free bonus
