Soft and Chewy Cut Out Sugar Cookies

Everyone needs a good sugar cookie recipe in their back pocket. If your ideal sugar cookie is chewy and soft, flavorful but not too sweet, holds it’s shape, and is easy to work with, keep reading because this recipe is for you! There are two key ingredients that in my opinion, make all the difference in this recipe.

I’ve been working on this recipe on and off for over a year now, making tweak after tweak to find balance between taste, texture, and workability. I feel as if a thank you is in order to all the family and friends that have been faithful taste testers and feedback givers!
This post may contain affiliate links and I may earn a small commission when you click on the links at no additional cost to you.

So let’s get started. Today we’re going to go over some sugar cookie basics to give you the best chance possible of getting a delicious batch.
First, whisk your flour, salt, and cornstarch together in a medium size bowl and set aside for later. Shout out to John from Preppy Kitchen for introducing me to the idea of adding cornstarch to sugar cookies! This is one of the “key ingredients” I mentioned earlier. Adding cornstarch makes a huge difference in the spread, and workability of the dough!

Now, let’s talk ingredient temperatures. One of the key parts of this recipe being easy to work with right off the bat (chill time is optional, but we’ll discuss that more later) is making sure your ingredients aren’t too warm. Warm dough equals softer dough, AND can lead to more spread in the oven

You’ll want your butter to be BARELY softer than fridge temp. If you press your finger in to it, you want it to give a little but still be fairly firm. A quick way to reach this consistency is to take your chilled butter from the fridge and pop it in the microwave for 10 seconds.

Mix your butter in the bowl of an electric mixer just until it begins to evenly spread around the sides as shown in the photo below. This is where you’ll need to add your cold cream cheese, and then beat until combined. Don’t go overboard on this, but do make sure they’ve fully incorporated by scraping down the bowl and beater as needed along the way.


Also, one more shout out to the first bakery I had the privilege of working in (Frosted in Walla Walla, WA) for introducing me to the idea of cream cheese in sugar cookies! The tang it adds is DELICIOUS and it helps them to stay tender and soft.
Next, add in your sugar and beat until incorporated. Once again, we’re not looking to add a ton of air by beating for long periods of time. Excess air in a dough can also lead to spreading.

Add in the egg and yolk, along with the vanilla and almond extracts and mix to combine.

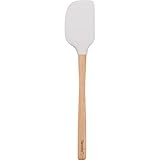
Scraping down your bowl frequently will help ingredients evenly incorporate more quickly, lessening your chances of overworking your dough! I really like this stiffer silicone spatula for making cookie dough that I’ll link below.
With your mixer on low, slowly add in the flour mixture. Keep an eye on it so you can turn it off when you see there are no more dry ingredient streaks remaining. Give the bowl and beater a thorough scrape to ensure there are no wet ingredients remaining. Evenly mixed dough increases the consistency of your cookies from the first one you roll out, to the last!

Now here’s where you get to choose your own adventure. A hot topic in the world of sugar cookies is chill time. I did a poll on Instagram to hear what people prefer when it comes to having to chill sugar cookies, and the vast majority of bakers were totally fine with it if it meant better cookies in the end!
Here’s the cool thing about this dough. You can totally get away with not chilling it! You’ll need a bit more flour as you roll it out, and you’ll probably have a pinch more spread in the oven (but when I say pinch, I mean less than 1/8 inch difference from chilled dough option). If 1/4 inch total spread (1/8 inch per side) across your cookie is no biggie to you, by all means, feel free to skip chilling your dough! But before you do…read through the chilled dough option to see if I can convince you it just might be worth your while.

I ran tests to measure how much the cookies would spread with no chill time, two hours of chill time, and two hours chill PLUS ten minutes of chilling after cutting out the shapes, and here’s the verdict.

| Chill Time | Total Amount of Spread |
| None | =<1/4 inch |
| 2 Hours Pre Rolling/Cutting | =<1/8 inch |
| 2 Hours Pre Rolling/Cutting PLUS 10 Minutes Post Rolling/Cutting | <1/8 |
Based on the information above, you can decide which chilling route you’d like to take! Something I will add as a benefit to chilling your dough, is that you need less flour to roll it out, and it’s even EASIER to work with and pop out of your cookie cutters. I used snowflakes which can be tricky sometimes, but with the chilled dough it popped right out! My preferred method is to chill my dough in two saran wrapped one inch thick discs or squares for two hours before rolling, cutting, and baking!

Also, I can’t recommend a rolling pin with guide rings enough. This bad boy makes quick and consistent work of rolling out any kind of dough. I prefer to roll sugar cookies out at 3/8 of an inch so they stay thick and chewy. I’ll throw a link down below!

When rolling out your dough, your goal should be to handle it the least amount possible. The more you work your dough, the more it is likely to spread. Get as many shapes as you can out of each roll out! Something I like to do is take the scraps from my first roll out, and then wrap them back up and pop them back in the fridge while I roll out the second disc of dough. Then, I combine the scraps of the first and second roll out to complete the third roll out and go from there until all the dough has been used.

I also would recommend picking your dough up every several rolls and swiping over the counter and backside of the dough to make sure you have an adequate amount of flour to reduce sticking! If you roll your dough out all at once, you might get to the end and realize your dough is stuck to your counter making your shapes a bit more difficult to remove.

You can always use a small offset spatula to move your cookie shapes from the counter to your trays to avoid pinching or bumping the dough!

As you go, you can dip your cookie cutter in a bowl of flour to make the dough release even more easily.
Now that you have your dough rolled and cut, you may be asking, what is the best surface to bake sugar cookies on? I will pass along a recommendation to use either parchment paper, or a silicone mat. Avoid anything greased or non stick, because that can lead to extra spreading. With how well this recipe holds it’s shape, you can really pack a lot onto one tray (just don’t go any close than 1″ apart)!

P.S. I was a parchment paper girl for years but lately I’ve been loving the silicone mat! Here’s a link to the one I use.

Bake your cookies at 350 degrees Fahrenheit for 12-15 minutes, or until cookies are no longer shiny on top. I look for the sheen to go from shiny, to an even eggshell finish. Making sure you don’t over-bake your cookies is a key step in having a moist result that isn’t dried out! I shoot to have no brown edges/bottoms on my cookies.

So before we get into buttercream and decorating, let’s summarize some of the basics we’ve gone over today!
Sugar Cookie Tips Summary
- Use cold ingredients to make the dough
- Avoid over mixing
- Scrape down the bowl often
- Chill dough for two hours to achieve the best workability and the least amount of spreading
- Handle dough/re-roll as few times as possible
- Use a rolling pin with guide rings for consistent dough thickness
- Dip cookie cutter in flour as you go to help the dough release more easily
- Bake cookies on a silicone mat or parchment paper
- Bake cookies for 12-15 minutes, until the sheen of the tops has changed from shiny, to an even eggshell/matte finish. Avoid over baking and do not brown edges/bottoms. Rotate your baking sheet halfway through the bake time.
- Allow cookies to cool completely before frosting
Sugar Cookie Frequently Asked Questions
Can I use unsalted butter instead of salted?
Yes you can! If you use unsalted, just add an additional heaping 1/4 tsp of salt.
Is it more accurate to measure ingredients by weight, or volume?
Measuring by weight will give you the most accurate results and will be the most true to how this recipe was developed. Depending how densely packed an ingredient is, the amount that fits in 1 cup can vary. If you choose to use cups, I would recommend spooning your flour into the measuring cup rather than scooping it out with the measuring cup itself.
Do these cookies hold their shape?
These cookies hold their shape extremely well! I developed it to be soft and delicious, but still hold clean lines to create beautiful backdrops for decorating. Even with zero chilling, this recipe spreads less than 1/4 inch total. To achieve the sharpest shapes (less than 1/8 inch total spread), chill the dough for two hours before rolling, cutting, and baking.
How can I get the least amount of spread in my cookies?
- Use cold ingredients.
- Avoid over mixing, over handling, and over rolling your dough. The more air you incorporate, the more potential spread you may have.
- Chill your dough for two hours before rolling, and if you want to go the extra mile you can even chill your cookie shapes on the baking sheet for ten minutes after cutting your shapes to further reduce spread!
- Bake cookies on silicone mats or parchment paper. Do not use any type of greased or non stick metal because the cookies will have less “grip” and will spread further.
- Bake at the proper temperature. Using too low of a temperature causes the butter to melt and spread before the cookie has begun to set. Use an oven thermometer to get accurate readings on your oven’s temperature.
- Use a recipe (like this one!) that doesn’t include leaveners like baking soda and baking powder.
- Use quality aluminum baking sheets that will evenly conduct heat.
Do I have to chill the dough?
You can totally get away without chilling this dough. However, you will need to use a bit more flour when rolling it out, and it might spread a pinch more (and when I say a pinch, I mean less than 1/8 of an inch more than if you were to chill it). For BEST results, chill the dough for two hours before rolling, cutting, and baking. To chill, I prefer to divide the dough into two halves, and then wrap each half in saran wrap and press it into a disc that’s one inch thick. Chilling makes the dough’s consistency a dream to roll and cut shapes, and produces a cookie with little to no spread. We’re talking 1/8 of an inch to none.
Can I make the dough in advance?
Yes! Cookie dough will last three days in an airtight container in the refrigerator, and in the freezer for two months.
Can I freeze the cookies once they’ve been baked?
Yes! Baked unfrosted cookies will last 3 months in an airtight container in the freezer.
Vanilla Almond Sugar Cookie Buttercream
Allow the cookies to cool before frosting. I’ve included my go to Vanilla Almond Sugar Cookie Buttercream that has one more unexpected ingredient that creates the dreamiest flavor! It’s also not overly sweet like a lot of American buttercreams can be so you won’t feel like you have to skimp on the frosting to avoid a toothache.

Unlike the cookie dough, you DO want to beat the butter until light and fluffy for longer periods of time. It makes a big difference in the density and sweetness of your buttercream! Then once you’ve added your extracts, powdered sugar, salt, and then beat it until the whole mixture is light and fluffy, we can move along to my favorite addition.
Say hello to my last key ingredient, French Vanilla Coffee Creamer! You could totally sub this for heavy cream if you’d like to and just compensate with extra vanilla and almond extract to taste, but honestly, you should definitely give the french vanilla a chance! P.S. the salt in the buttercream is important to give balance to the sweetness, so don’t skip it!

I really wanted this buttercream to be creamy and delicious, so I increased the amount of butter I usually add to a buttercream. It does create an “off white” frosting, but I think the flavor and texture is worth it. If you’d like to reduce the yellow coloring a smidge, you can add a TINY tiny amount of purple food coloring which will tip the color to a cooler shade. Go small on this though because you can always put more in, but you can’t take it back out!
To smooth out air bubbles in your buttercream, I recommend running the mixer on low for at least 5 minutes to work out more of the air pockets.

Tip: My FAVORITE buttercream consistency to work with is semi chilled. I love to make my buttercream in advance, thoroughly chill it in the fridge, and then beat it again in my kitchen aid until it smooths out. This method has produced the SMOOTHEST buttercream with the least amount of air bubbles for me!
Check out more winter dessert tutorials in the posts below.


I’d be absolutely honored if this cookie recipe made it’s way into your kitchens and celebrations. Please feel free to tag me on Instagram or shoot me a message to let me know how it goes or ask any questions if you give it a try! Thanks for stopping by, and Happy Holidays!


Soft and Chewy Cut Out Sugar Cookies
Ingredients
Sugar Cookies
- 6 oz salted butter (still cold, but just soft enough to make small dent when pressing firmly on it) (12 tbsp)
- 2 oz cream cheese (cold) (4 tbsp)
- 10.5 oz granulated sugar (1 ½ cups)
- 1 egg plus 1 egg yolk
- 2 tsp vanilla extract
- 1.5 tsp almond extract
- 14.8 oz all purpose flour (3.5 cups)
- ½ tsp salt
- 40 grams cornstarch (1/3 cup)
Vanilla Almond Sugar Cookie Buttercream
- 12 oz softened salted butter (1 ½ cups)
- 17 oz powdered sugar (4 cups)
- 2 tsp vanilla extract
- 1 tsp almond extract
- 1 pinch salt (1/8 tsp ish)
- 1 tbsp french vanilla coffee creamer (Optional sub. heavy cream and add extra vanilla and almond extract to taste)
Instructions
Sugar Cookies
- If using the no chill method, preheat oven to 350° and line two baking pans with silicone mats (or parchment paper). If you plan on chilling the dough, preheat the oven and prep pans just before rolling out dough and cutting shapes.
- In a medium sized bowl, whisk together flour, salt, and cornstarch. Set aside.
- Beat the butter in a large sized bowl using an electric mixer until butter has begun to evenly spread around the sides. Add in cream cheese and mix just until combined. Scrape down the bowl, and repeat.
- Add in granulated sugar, and mix until well combined scraping down the sides of the bowl and beater as you go. Do not continue mixing to make it light and fluffy.
- Mix in the egg and egg yolk, and beat until incorporated. Add in extracts and mix them in as well, once again scraping the bowl to ensure even mixing.
- With the mixer on a low speed, slowly add in the flour mixture, and allow dough to come together until no dry ingredient streaks are remaining. Stop the mixer, scrape down the bowl and beater, and beat for another several seconds on medium speed.
- If chilling, divide the dough in two pieces and press each half into a 1 inch thick disk or square, and then wrap in saran wrap. Place the dough in the fridge for two hours.
- Lightly flour your work surface and your dough, and roll out half of your dough out until it's 3/8 inch thick. Every several rolls or so, pick the dough up and swipe your hand across the back of it and the counter to check for adequate flour amounts to prevent sticking. Use minimal flour, just enough to prevent dough from sticking to the counter and rolling pin. Dip cookie cutter in flour every other cut to prevent sticking as well.
- Cut out as many cookies as you can from your first roll out, and place them on to the prepared baking sheets with 1" of space minimum. Squish together the scraps in saran wrap and place them back in the fridge while you roll out the second half of the dough.
- Once you've cut shapes from the second half, squish together remaining scraps of dough from both halves to re-roll. Continue rolling the dough, cutting shapes, and squishing together scraps until no dough remains. (Try not to knead the dough together when working with the scraps, but instead squish it and pull the seams to the backside. The goal is to work the dough the least amount possible.)
- For the most even bake, bake one tray at a time on the center rack for 11-14 minutes, or until the tops of the cookies are no longer shiny, but instead are an eggshell/matte finish. Do not bake cookies to the point of browning because it will dry them out. (You can bake multiple trays at a time, but run the risk of cookies baking less evenly. If you choose to do multiples, make sure to rotate trays around halfway through. If you roll the cookies thinner than 3/8, you will also want to bake them a bit less, and should start checking around 8-10 minutes)
- Allow cookies to cool completely before frosting. Store in an airtight container.
Vanilla Almond Buttercream
- Beat room temperature butter in the bowl of an electric mixer on medium high for 1 minutes. Scrape down the bowl and add vanilla and almond extract, and beat for another 3-5 minutes until light and fluffy.
- With the mixer on a low speed, slowly pour in the powdered sugar along with the pinch of salt. Once the dry ingredients have been incorporated, turn the mixer up to medium high and beat for 5 more minutes.
- Turn the mixer on low, pour in the coffee creamer (or heavy cream). Stir until combined, and then allow the mixer to run on a low speed for another 5 minutes remove the majority of the air bubbles. (For optimal decorating texture, allow finished buttercream to thoroughly chill in the fridge, and then rewhip it until smooth but still slightly chilled.)
- Frost cookies in your preferred method, and eat within 3 days. Store in an airtight container. Enjoy!
Leave a Reply
Subscribe now to snag your freebie and stay up to date on the latest recipes and baking fun. Discover simple yet powerful tips that will have you creating bakery-worthy treats in no time.
7 Tips to Instantly Elevate Your Baking
Join My Email List for a free bonus

How to split a batch and make ombré macarons, tower display options, and a few other tips and tricks.
How To Make An Ombré Macaron Tower

To rest macarons or not to rest? Or…Option C, the oven drying method!
How to Oven Dry Macarons and Skip the Resting Process

Ready to begin making macarons? Here's all the supplies you'll need.
Macaron Supply List: Everything You Need to Make Your Own Macarons

A detailed list of the current gear I use to capture photos and videos.
Must-Have Food Photography Gear: Cameras, Lenses, Backdrops, and More

Good morning Megan! My friend Jammie shared your link with me! I’m so glad she did! I can’t wait to try your sugar cooike recipe. Have you ever used cream cheese that has been frozen? I have a Costco multi pack in my freezer!
Merry Christmas!
Hi Donita! Thank you for the kind words! I have never tried using cream cheese that has been frozen. I’d love to hear how it goes if you give it a go!
Thank you! I will let you know if the frozen cream cheese works.
Can refrigerated egg substitute be used?
Hi there! I’ve never tried this out so I wouldn’t be able to give a for sure answer. I’d love to hear how it goes if you give it a try!
Hi! I can’t wait to try these in seashell molds I have. Do you think I could add mini chocolate chips to the vanilla cookie dough? I probably wouldn’t frost them. So you store them at room temp? Thanks!
Hi Valerie! I think you could definitely add chocolate chips to your cookie dough!
Thanks for all the details!! If I like my cookies sweeter can I just add an extra 1/4 cup of sugar? And not adjust anything else? 🙂
Hi Bernadette! You could try it out but it’s possible it would also make the cookies spread more or be crisper too 🤍
Hi I would like to try out this recipe. Is possible to get in grams
Hi Juli! I recommend Google conversions for recipes that don’t have the auto convert feature 😊🤍
[…] Soft and Chewy Cut Out Sugar Cookies […]
[…] prep the dough. This recipe is basically my go to Soft and Chewy Cut Out Sugar Cookie recipe with just a few variations! I skipped the cornstarch since holding shape is not a factor, and […]
[…] a cookie dough recipe? The dough from my Soft and Chewy Cut Out Sugar Cookies works great for this […]
I just came across your Reel & without having made them yet (I’ll update when I do) I’m throughly impressed with how they look & your attention to detail!
Thank you for your unique recipe! Should the eggs be cold or room temp?
Hi Liz! I recommend using cold eggs for this recipe 😊
[…] but if you’d like a sugar cookie recipe to use them with I highly recommend my go to Soft and Chewy Cut Out Sugar Cookie […]
[…] Treat Mold Snowflake Sugar Cookies Soft and Chewy Cut Out Sugar Cookies 3 Ways to Make Snowflake […]
Is this a crusting buttercream? Love your recipes and was thrilled to find your blog after seeing you on Holiday Baking championship!
Hi Aimee! Thank you for the kind words, happy to have you here! 😊 To answer your question, this buttercream does not crust! It stays nice and soft. I usually just store everything in a single layer!
This is one of our all time favorite cookie recipes! I’ve been making them every year at Christmas since 2022 and everyone loves them! It’s one recipe I’ve actually printed out and have in my recipe box so I don’t lose it!
[…] flavor that you can swap out for some of your dry ingredients. In this case, I used my classic Soft and Chewy Cut Out Sugar Cookies recipe and subbed 2 oz of the flour for 2 oz of the freeze dried strawberry […]
very nice post, i actually love this website, keep on it