French Blue Floral Buttercream Cookies


Welcome to the White Whisk! Today we’re going to be learning the design techniques needed to make this dreamy and delicate set of buttercream floral sugar cookies. The french blue, gold, cream, and sage color palette had me swooning! This cookie set would be a gorgeous addition to any bridal shower, wedding, or baby shower dessert table. These designs use a combination of palette knife techniques along with a bit of piping, so buckle up and we’ll get started.

I made this set of buttercream cookies for my sweet Brother and Sister in Law’s baby shower. This will be my first time being an Aunt and I am OVER THE MOON excited to meet their little nugget. The baby shower was held at the cutest little country chic venue that went hand in hand with the theme/color palette my Sister in Law was hoping for. Here’s a few photos of the fun!


To check out how I made this ombre macaron tower, Click Here!
This post may contain affiliate links and I may earn a small commission when you click on the links at no additional cost to you.

Now, back to cookie business. Today we will be focusing on the decorating techniques, but if you’d like a sugar cookie recipe to use them with I highly recommend my go to Soft and Chewy Cut Out Sugar Cookie recipe!
Blue and Gold Hydrangea Sugar Cookie Design

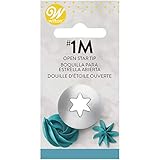
First up, let’s go over this SUPER easy hydrangea design! When I say easy, I mean EASY. All you need is a Wilton 1M piping tip, your piping bag, and some edible gold pearls! This medium french blue was created with equal parts Americolor Violet, and Americolor Sky Blue. If you’re supply shopping, check out the links below. I’ll also include the food coloring I used to achieve this shade.
To begin your hydrangea buttercream cookies, make begin piping dollops all the way around the edge of your cookie. The pipng motion I used was to apply pressure, and slightly spin as I released to create this petal shape.

Once you have your rim of dollops, fill in the center with 2 or 3 more. You’ll need your frosting to be in that sweet spot consistency where it’s not so warm the petals will merge into each other, but not so cold the frosting doesn’t want to separate from your bag when you release pressure to lift off of your dollop.

When your cookie is filled with your blossoms, place one edible gold pearl in the center of each flower. I found using a pair of tweezers to be the most effective and precise. Check out the video below to see the technique in action!


Palette Knife Tulip Buttercream Cookies Design

Next up, let’s talk about these palette knife tulip buttercream cookies! I recently was gifted a set of palette knives and I’ve been having so much fun testing them out! Here are a few pros and cons I experienced in my first few times using them.
Palette Knife Pros
- No piping bags/tips needed
- Easily switch colors/designs
- Relaxing and fun to use
- Creates unique textures and layers
- Many shape possibilities with each knife depending on technique
Palette Knife Cons
- Takes much longer than piping
- Trickier to create fine lines
- Knives need to be “cleaned” between each petal
All in all, I really enjoyed incorporating the palette techniques and will DEFINITELY be using them more in the future! Here’s the palette knife set I used from Sleeping Makes Me Hungry.
The light french blue shade was also created with equal parts Americolor Violet, and Americolor Sky Blue, I just used less than the medium french blue shade. The sage green was made with Americolor Leaf Green and Wilton Brown.

To create the background for this design, I tried out a technique I’ve seen people use on cupcakes! Pipe a large dollop of buttercream in the center of your cookie using a large round piping tip.


Flip cookie over on to a baking sheet lined with parchment paper, and press down until you can see the frosting almost reaching the edge. Next, pop the tray in the freezer for about 10 minutes. Once the frosting has been thoroughly chilled, peel cookies off of the parchment.

Can we just appreciate how satisfying that is? So smooth and perfect!! Take one cookie out at a time to add your palette knife work so the background remains firm.

Next, you’ll need a medium sized palette knife, and a cutting board. Spread a thin layer of cream white (uncolored) buttercream in the shape of a rectangle on your cutting board. Holding your palette knife at a 45 degree angle, begin making small scrapes in your rectangle of frosting moving from left to right to build up a petal. Experiment with angles to find which one works best to keep your frosting moving in the right direction as your form your petal. See video for visual reference. Be sure to scrape your knife edges clean between each petal for the most precise look!
Once you have a small amount of overhang on your petal, gently press your petal down on to your (still cold) cookie to create the first petal of your tulip. Place another petal next to it slightly overlapping. Then, working right to left this time as you create your petal, add one more to the right side of your flower. If you like how it looks, go a head and leave it. If you want to add one or two more, feel free!

Next, add two more small tulips on either side of the larger main flower using only two small petals.

Then use a long narrow palette knife to add two or three long tulip stem type leaves per flower.

To finish it off, use a size 2 piping tip to pipe a thin sage green stem. Voila! You’ve got yourself a gorgeous tulip sugar cookie!


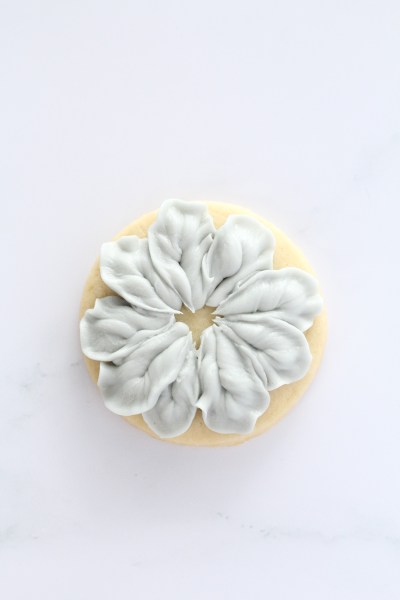
Rosette Floral Palette Knife Buttercream Cookies Design

While we’re on the subject of palette knives, let’s talk about our third design. You’ll want to add your palette knife greenery first using the same sage green shade mentioned earlier. I used a large palette knife for this one and created a build up of buttercream on the back of the knife by scraping it back and forth at a 45 degree angle. Place 4 leaves around the edges of your cookie by placing your loaded palette knife down and pulling toward the center. For the cleanest look, make sure there is no excess frosting piled up on the knife and your edges are clean.

For the bud flower, you’ll be using more of the cream white buttercream. Use a Wilton 125 tip with the skinny end on the tip of your petals.


Pipe two or three petals slightly off center from the middle of the cookie. Then, add a small dollop of the same color with a Wilton 1M to the left of your bud.

The last thing you’ll pipe is a large rosette with the same Wilton 1M. Finish it off with a few white sugar pearls on your small dollop.

Full process in the video below!
Blue and Gold Ruffle Flower Cookie Design

This next design is another super easy one! Fill a piping bag with the same light french blue shade from earlier and fit it with a Wilton 97 tip. Making sure the skinny edge is pointing “out”, pipe each petal beginning just a pinch away from the center of the cookie. Slightly wiggling as you pipe towards the edge, curve around and then pipe back towards the center.

Pipe one layer of petals all the way around the edge of your cookie. Fill in the center with edible gold pearls. See the video below to check out the technique!

Blue and Gold Abstract Cookie Design

This last design isn’t necessarily a floral cookie, but it was a great design to incorporate the colors of the set and add a few more pops of blue and gold!
For the background of the abstract buttercream cookies, use the same dollop, flip, squish, and freeze technique mentioned in the palette knife tulip cookie design.


Next, let’s add some color! You can be creative and create your own design, or if you’d like to achieve a similar look to the cookies in this set you can follow the pattern I used. Using your palette knives, add a large streak of the deeper blue to the top from left to right.

Next, add a streak of the light blue on the right side from right to left.

Last, add a small streak of the cream shade on the bottom left, moving from left to right.

To finish it off, add a few gold accents with fine gold sanding sugar and a pop of gold leaf!


Here’s the products that can be used for this design. Even the small amount of gold leaf on each cookie really elevates the design and makes it look super elegant!
No products found.

This abstract design was one of those things where I was questioning it every step of the process, but once each element was added it all came together so beautifully! Check out the video to see the technique in action.
Hope you enjoyed walking through these sugar cookie decorating techniques! If you’re looking for a deliciously soft and chewy sugar cookie recipe to try out with these designs, head over to my Soft and Chewy Cut Out Sugar Cookie Recipe!

Leave a Reply

| New |
Learn how to whip up gorgeous macarons from your own kitchen with step-by-step lessons that simplify the entire process.
Learn More
The White Whisk
Online Macaron Course
How to split a batch and make ombré macarons, tower display options, and a few other tips and tricks.
How To Make An Ombré Macaron Tower

To rest macarons or not to rest? Or…Option C, the oven drying method!
How to Oven Dry Macarons and Skip the Resting Process

Ready to begin making macarons? Here's all the supplies you'll need.
Macaron Supply List: Everything You Need to Make Your Own Macarons

A detailed list of the current gear I use to capture photos and videos.
Must-Have Food Photography Gear: Cameras, Lenses, Backdrops, and More

Subscribe now to snag your freebie and stay up to date on the latest recipes and baking fun. Discover simple yet powerful tips that will have you creating bakery-worthy treats in no time.
7 Tips to Instantly Elevate Your Baking
Join My Email List for a free bonus

Pls can you share cookie recipe…
Hi there! I am still in the process of refining my cookie recipe, but I hope to share it soon!
[…] French Blue Floral Buttercream Cookies […]
This whole baby shower setting was picture perfect! I’m fascinated by the floral cookies. could you please share your buttercream recipe? Is it the same for the base and for the flowers?
Hi Michelle! Thank you for the kind words. I have my go to sugar coookie recipe and the buttercream I use with it on my “Soft and Chewy Cut Out Sugar Cookies” Blog post. I used the same buttercream for the base and the florals!
Hello could you please tell me how these stored after decorating? refrigerate or freezer? They are absolutely gorgeous and I am excited about doing them for my daughters baby shower.
Hi Karen! I recommend storing these cookies in a single layer in an airtight container the fridge after decorating. You can also do the freezer to retain freshness if they’ll be stored for more than a day or two, but the ideal scenario would be the fridge for the best texture in the buttercream.
These designes are so beautiful! I did the one with the 3 white flowers last night 😍 Does your buttercream harden? I just made one from another site and let them dry overnight on the counter are but they are still soft 🙁 I’m trying to find something that will harde n for stacking.
Hi there! Catching up on my comment replies right now, thank you for the kind words! This buttercream stays soft and creamy due to the lower ratio of powdered sugar. It’s developed to be less sweet than other buttercreams, which usually crust and harden due to the higher ratio of powdered sugar to butter.
Hi! These are gorgeous and I plan to try them (in pink!) at an event. Did you have any trouble with the buttercream frosting melting? I’m worried about setting them out at the event for fear of them melting!
Hi there! I always recommend placing cookies in a cool area until the last possible moment if the space is going to be warm that they are served in. Buttercream will soften and eventually melt if its too warm in the environment. If it’s normal room temperature though, they are fine to be out for awhile and will be stable!